How to Add MQTT Connectors
Learn how to add and configure MQTT connectors in AVstudio to enable communication with external systems and devices through the MQTT protocol.
You can configure multiple MQTT connectors to manage data exchange between AVstudio and systems such as Node-RED or Home Assistant. This article explains how to create, configure, and save MQTT connectors in Project Settings.
Prerequisites
- MQTT broker address and port (for example, 1883 for TCP, 8883 for TLS)
- Credentials if required (username/password)
- Network reachability (firewall/NAT allows outbound to broker host/port)
- Any necessary CA or server certificates if using TLS
Recommended defaults
- Port: 1883 (TCP) or 8883 (TLS)
- Keep Alive Timeout: 60 seconds (typical starting point)
- Reconnect Timeout: 3000–5000 ms for a quick, steady retry cadence
- Secure connection: enable when the broker supports TLS; prefer TLS in production
Adding an MQTT connector
Step 1: Open a new or existing project. From the Project Dashboard, select Settings ☰ then Project Settings ⚙️.
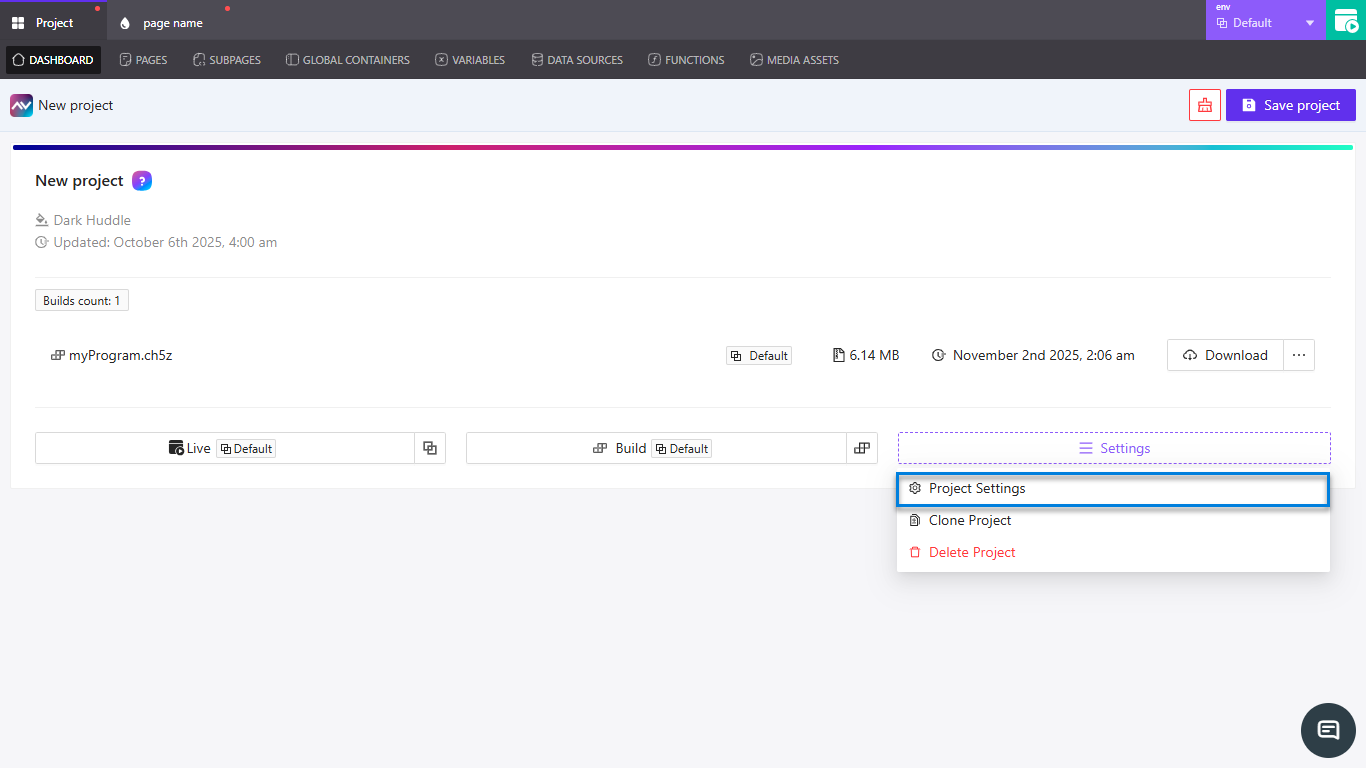
The Settings menu on the Project Dashboard with “Project Settings” selected.
Step 2: In the Project Settings ⚙️ panel, locate Project settings with environment support then Project connectors.
Step 3: Under Project connectors, click the expand arrow > beside MQTT connectors then select +Add mqtt connector.
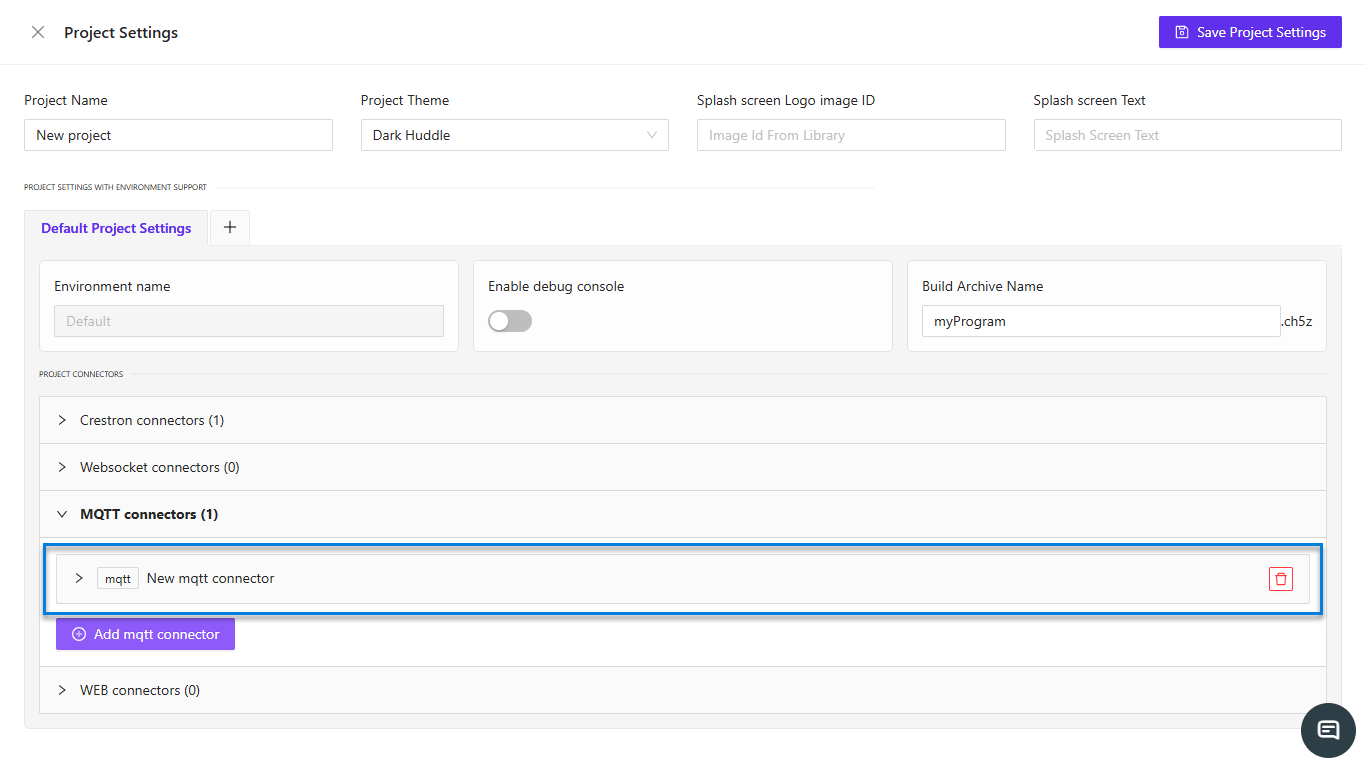
The Project connectors panel with “MQTT connectors” expanded and the “+ Add mqtt connector” button.
A new entry appears under MQTT connectors, labeled New mqtt connector.
Step 4: Click the expand arrow > beside the connector name to display its configuration fields.
Step 5: Fill in the required details:
| Field | Description |
|---|---|
| Name | Identifier for the connector |
| Host | MQTT broker address |
| Port | Broker port number |
| Path | MQTT path (optional) |
| Username | Optional authentication field |
| Password | Optional authentication field |
| Secure connection | Enable for SSL/TLS |
| Reconnect Timeout (ms) | Time interval before reconnection attempts |
| Keep Alive Timeout (seconds) | Interval for maintaining an active connection |
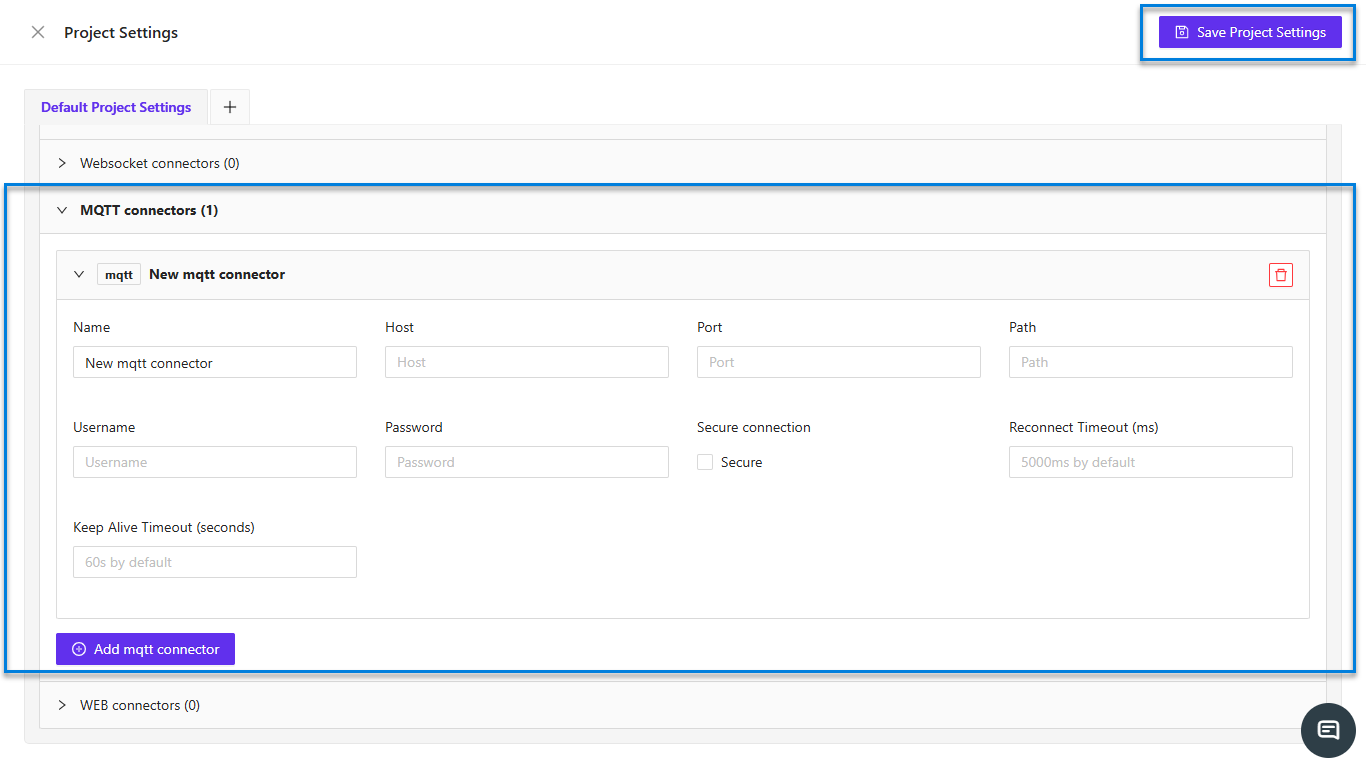
The new MQTT connector form with all fields visible and the Save Project Settings action.
Step 6: To manage connectors, use the following options:
- Select the trash icon 🗑 to remove a connector.
- Select +Add mqtt connector to add another connector.
- Select 💾Save Project Settings when finished.
Security best practices
- Prefer TLS (Secure connection) and validated certificates for production
- Use least-privilege credentials; avoid anonymous access on internet-facing brokers
- Keep credentials out of screenshots and shared repositories
- Rotate passwords and certificates on a regular schedule
Troubleshooting
| Symptom | Likely cause | How to fix |
|---|---|---|
| Connection refused / unauthorized | Wrong username/password or ACL | Verify credentials and topic ACLs with your broker admin |
| Timeout / cannot connect | Host/port blocked or unreachable | Check firewall/NAT; confirm DNS and that the broker is listening |
| TLS error / certificate verify failed | Missing or invalid CA/server cert | Import the correct CA; ensure broker cert CN/SAN matches host |
| Frequent disconnects | Keep alive too low or broker limits exceeded | Increase Keep Alive; review broker connection limits and logs |
| Messages not received | Topic mismatch or permissions | Confirm exact topic names/casing; check ACLs and retained settings |
Summary
You’ve now learned how to create and configure MQTT connectors in AVstudio to communicate securely and efficiently with external systems.